I have taken on a posament project, the interpretation of a headdress after Birka grave 798. The drawing of the excavation shows how several posament braids were around the skull.
The reconstruction of the braid P1 is no problem and I have already made several braids of this type. But the braid P2 caused me problems in the past, because the description does not match the pictures. In the following article the actual braiding of P2 is analyzed and described.
A few facts about the grave
Grave Bj 798, a skeletal grave with a male skeleton, around 900 A.D. Only the skull was preserved from the skeleton. „Insignificant remains of a silver tablet woven band, a few pieces of knotted braids equal to P 10, 2 varieties of narrow braided silver cords, P 1 u. 2. The last ones formed a wide braid around the forehead and the occiput.“ (Translation from Birka III, page 167). „[P1] lay together with P 2, with which it was partially glued, next to the fragment of an indeterminable cloth backing. The silver is heavily oxidized, so that in places only the silk core remains.“ (Translation from Birka III, page 101). There are no further details about the remains of the tablet woven band and the P10 band.

P2 images
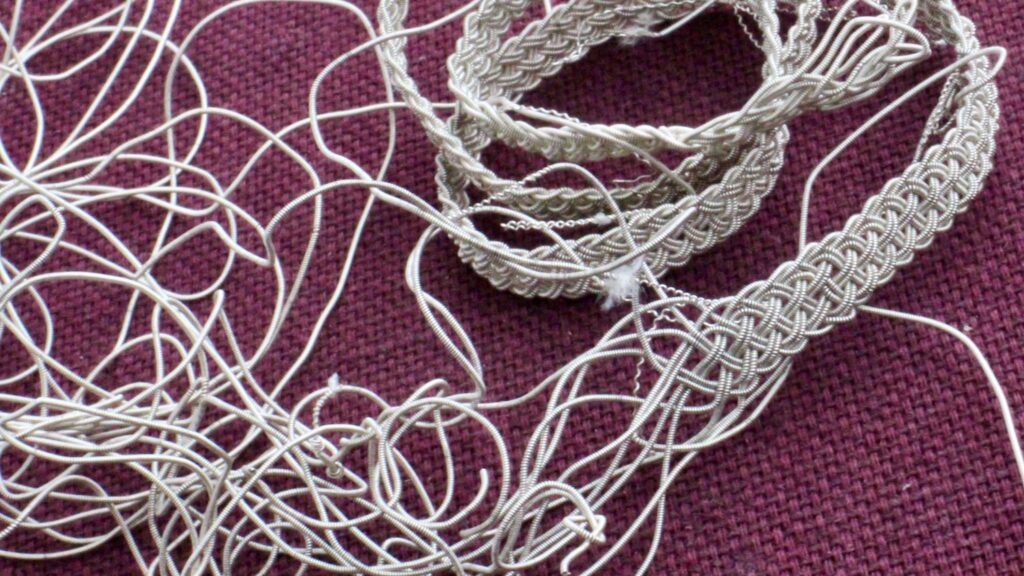
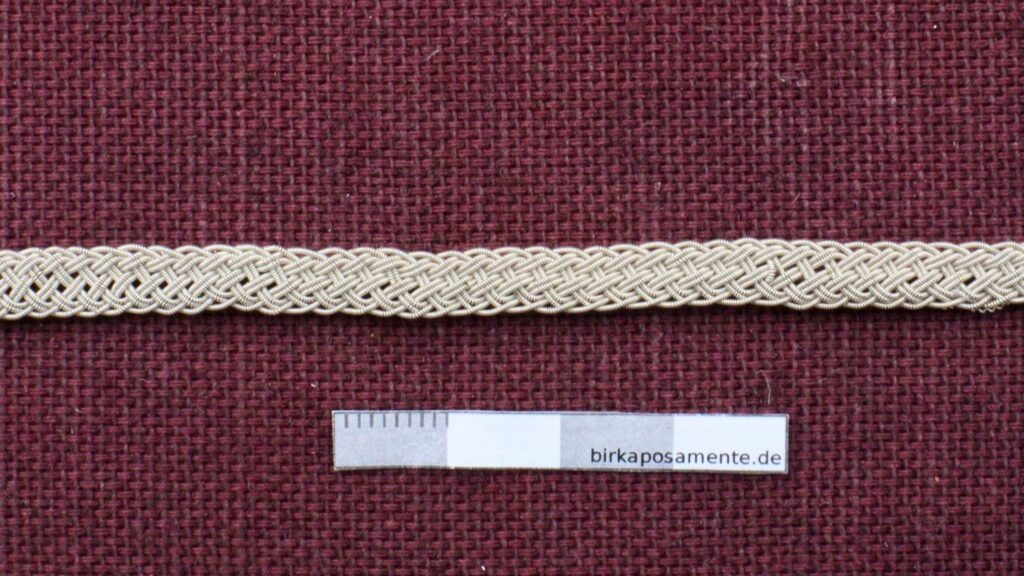
Some fragments from the P2 posament are shown on plate 26 (item 1) in Birka III.

On the website of the Historiska Museet Stockholm there are two photographs of the posament fragments, one of which is only a detail enlargement. The images have a good resolution and many details of the fragments are visible.


Braiding according to Birka III
Agnes Geijer describes P2 as „braided cord of six parts in flat braid, fig. 21 c. Fine spiral silver wire, double, i.e. two in each part.“ (Birka III, page 101). Figure 21c shows a braid of three cords in a regular braid with 6 strands.

I first tried to braid the posament according to this diagram but it looked different than the originals. In direct comparison a clear difference can be seen especially at the edges of the braid. The braiding method proposed by Agnes Geijer does not correspond to the originals and cannot explain their appearance.
Reconstruction of the braiding
Based on the high-resolution images of the posament fragments, the weave of the braid can be reconstructed. To do this, the first step was to analyze the photos and trace the individual spiral silver threads. On the photo, with the help of a drawing program, the individual threads were marked in color on several fragments. The length of the fragments was sufficient to determine the amount of necessary strands and their braiding.

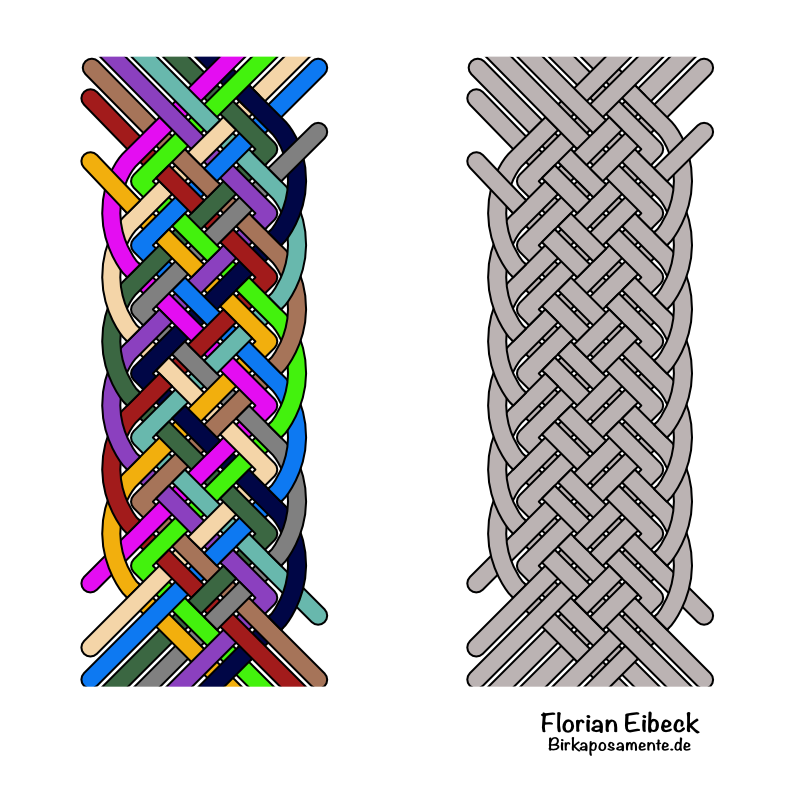
With the help of colored cords, I was able to reproduce the braid. It is a braid with 5 strands of two strands each, in which two additional threads are interchanged at the edge. Due to this constant interchanging, the individual threads in the strands change after each pass, so that not always the same two threads together form one strand.

This pattern supports the tight edges of the posament by allowing it to be held together more tightly. It also gives the impression of an additional twisted edge on the braid.
A braid of spiral silver thread made according to this method corresponds in appearance to the photographs of the original fragments.
Braiding instructions
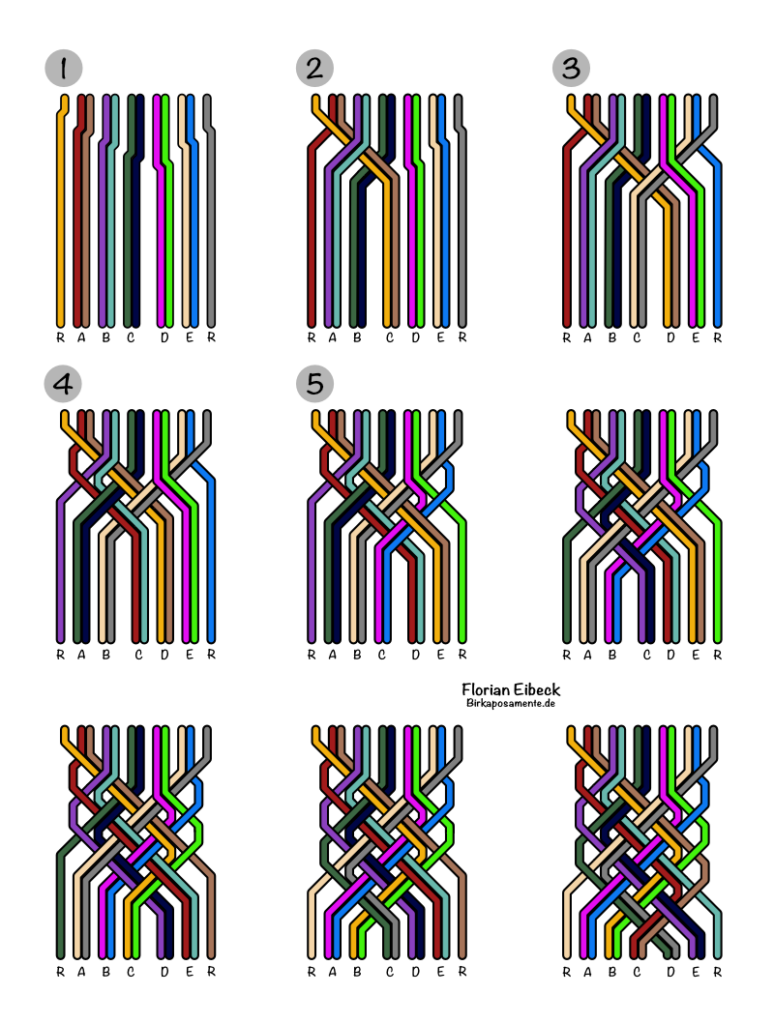
To braid the posament twelve individual threads are needed. These are gathered together for the start (with a clamp, tape, …) and fixed on the work surface for easier handling (weight, vice, tape, …). Due to the large number of threads, it is easy to get disorganized, so working freely in your hands without fixation for the start is not recommended.
The threads are spread out, a single thread on each side, the others to five pairs. Three pairs on the left, two pairs on the right. See step 1 on the picture.
The edge thread (R) of the left side is passed over the outer thread of pair A and together with the inner thread of pair A is passed under pair B and over pair C to the right side. The final position is shown in step 2.
Proceed in the same way from the right. The edge thread (R) is passed over the outer thread of pair E and passed under pair D and over pair C together with the inner thread. The final position is shown in step 3.
After each step, the band is pulled together. In the process, from top to bottom, tighten all the threads one by one until the desired density is achieved.
The pattern continues like this. See steps 4 and 5 and the following pictures.
In all steps, make sure that you do not cross the threads of a pair with each other.


Sources:
- Birka III. Die Textilfunde aus den Gräbern, Agnes Geijer 1938. https://historiska.se/birka/digitala-resurser/litteratur/digitaliserad-litteratur/
- Birka I. Die Gräber. Text, Holger Arbman 1943. https://historiska.se/birka/digitala-resurser/litteratur/digitaliserad-litteratur/
- Björkö grav Bj 798 at https://mis.historiska.se/mis/sok/kontext.asp?kid=993
Summarized in the Posament Database: https://database.birkaposamente.de/posaments/P2
